Watercolor Pencils Lesson: How to Color

Watercolor pencils: Key features

  • ◆Water-soluble colored pencils allow you to create similar effects to those found in watercolor paintings.
  • ◆Use a wet brush to dissolve colors in the colored sections.
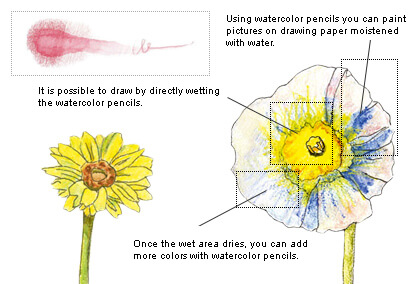
  • ◆Using watercolor pencils you can paint pictures on drawing paper moistened with water.
  • ◆Once the wet area dries, you can add more colors with watercolor pencils.
  • ◆It is possible to draw by directly wetting the watercolor pencils.
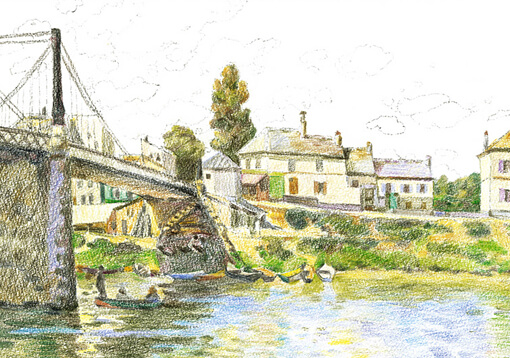
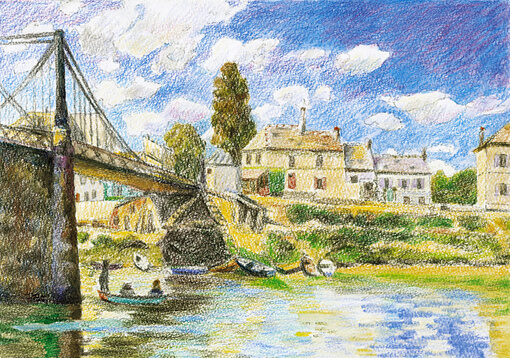
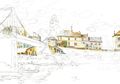
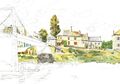
  • ◆The secret of how to use watercolor pencils is to first complete the entire drawing with pencils and then gently and carefully apply a water wash to create color mixes with beautiful color development.

How to Color “The Bridge at Villeneuve-la-Garenne”
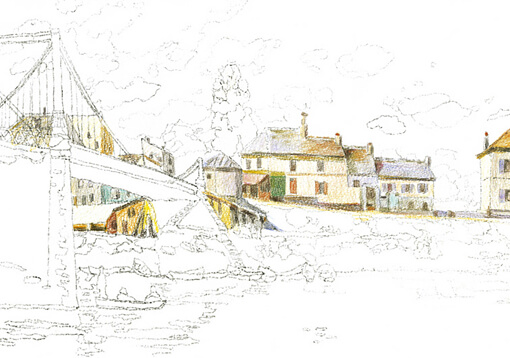
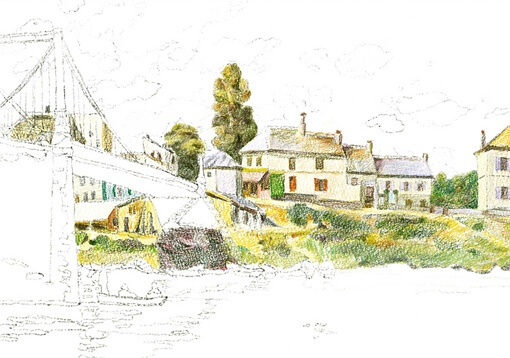
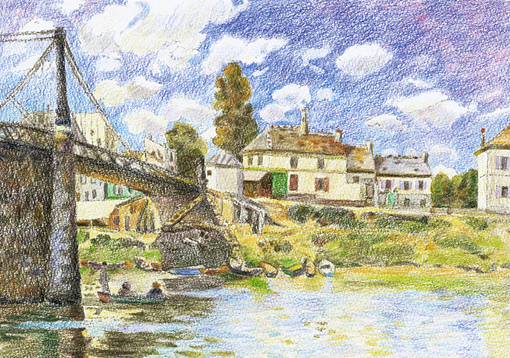
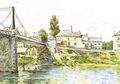
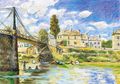
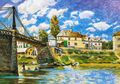
Bridge at Villeneuve-la-Garenne

Landscape pictures consist of many sections; therefore, it is good practice to divide your scene into sections and apply colors separately. For example, this picture is easily divided into four sections: buildings, trees and grass, the bridge and water surface, and the sky.

A sketch taken from “Nuri-e” published by Kawade Shobo Shinsha is used as an example.
Medium: Watercolor pencils

1Coloring the building section

Firstly apply colors to the buildings. To produce spatial effects for the buildings, be aware of the bright wall areas bathed in sunlight and the dark shady areas, and apply different colors.

2Coloring the trees and grassy places

For the trees in the foreground, create a strong shading contrast and apply different colors so as to clearly define the shading. For the trees in the background, create a gentle shading contrast, and apply different colors so that they appear to fade and soften. Color the earth bank and grassy places while giving variation to the shading.

3Coloring the bridge and water surface

For the dark areas of the bridge, really deepen the color. For the parapet and beam, strongly emphasize the front sections and then for the back sections, use softer colors to give a sense of fading into the distance.
For the water surface, create greenish color variations using a mix of colors different from the tones applied to the grassy places on the earth bank. For the white highlights on the water surface, make good use of the base white of the drawing paper, and do not apply any color.

4Coloring the sky

To capture the blueness of the sky, create bluish color variations using a mix of colors different from the tones applied to the water surface. For the whiter topside of each cloud, make good use of the whiteness of the drawing paper as it is, and do not apply any color.
For the underside of the clouds, to give variation and shading, add layers of pale purplish colors and pale yellowish or gray colors.

5Spreading the watercolor pencils by applying a water brush wash

When watercolor pencil colors are spread with water, the color tone becomes darker. In the whole picture, to give a feeling of solidity and depth to the bridge, particularly when expressing even deeper color, spread its colors with water.
To impart a feeling of gently flowing water to the water surface, and an expansive feel to the sky, use a brush loaded with water and spread and blend the colors. To emphasize the whiteness of the water surface highlights, darken the colors surrounding the highlights; directly wet watercolor pencils and paint by drawing broad and clear lines and planes.

6Finishing

The softness of watercolors allows you to express the broad expanse of the sky and the gentle flow of the water surface; the fineness of the colored pencils allows detailed expression. Consequently a unique well-modulated finish can be obtained for the picture surface. It is effective to separately depict those sections treated with water from those not washed with water; it is better not to spread water across the entire surface.