COUPY PENCIL: The Colored Plastic Pencil Lesson: How to Color

COUPY PENCIL: Key features

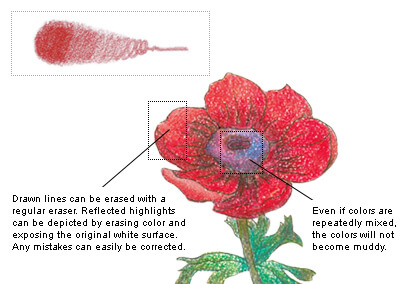
  • ◆As easy-to-use as colored pencils, but with the coloring power of crayons. The whole pencil is used to color, unlike a regular pencil with only a central colored lead.
  • ◆By changing the angle of the versatile COUPY PENCIL, holding it straight up or laying it flat, thick and thin lines can be freely drawn.
  • ◆Drawn lines can be erased with a regular eraser. Reflected highlights can be depicted by erasing color and exposing the original white surface. Any mistakes can easily be corrected.
  • ◆The secret of coloring with COUPY PENCIL is to hold it lightly with no excess force, and color by gently stroking the picture surface. Apply repeated layers to deepen the color, rather than applying color all at once.

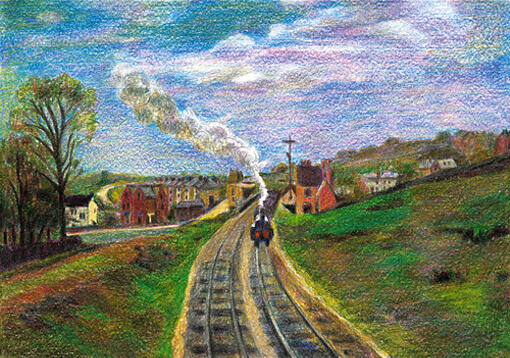
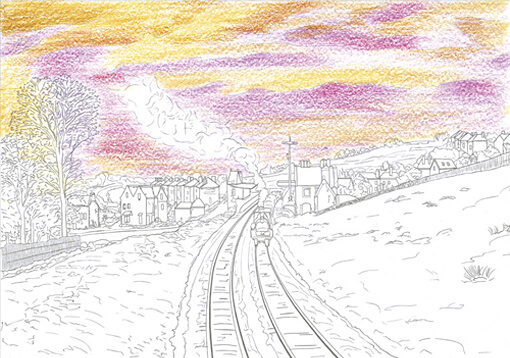
How to Color “Lordship Lane Station, Dulwich”

Lordship Lane Station, Dulwich

As a general rule, you first apply complementary colors as the base layers, and then by applying local colors, you can express subtle shading and give a sense of depth to your picture.

A sketch taken from “Nuri-e” published by Kawade Shobo Shinsha is used as an example.
Medium: COUPY PENCIL

1The sky: base layers

Apply base colors to the sky area; lightly color with pale yellows, pinks, etc. Do not leave the white cloud areas uncolored.

2The trees and grassland: base layers

For any particularly dark green areas of grassland, first apply the complementary color red. For the light grassland areas, apply yellows, pinks, or similar as the base layers.

3The buildings and locomotive: base layers

For the areas of reflected light showing as bright parts on buildings, apply warm colors such as yellows or pinks, and for the shady dark parts, apply cold colors such as blues or navy blue.
To give deep shading to the locomotive, apply a dark lapis lazuli, which is close to the complementary color.

4Adding layers of color to the sky

Use bluish local colors to give several different color layers to the sky.
An effective technique is to give shading to the sky by applying blue colors gradually darkening toward the upper part, and applying the pale purplish colors gradually shading toward the lower part.

5Adding layers of color to the trees

On the red base layers of the trees, add several layers of green colors to create a very dark color.

6Adding layers of color to the grassland

For the whole grassland area, firstly apply greenish gray to adjust the tone, and then apply layers of different shades of green to specific areas.

7Adding layers of color to the buildings and railway tracks

On buildings with base layers of complementary colors, add layers of local colors. To pick out the details of the buildings, sharpen the tip of the pencils and color. On the tracks with base layers of complementary colors, add layers of local colors

8Locomotive and smoke

To capture the column of smoke puffing from the funnel of the locomotive, use grayish light and shade, and bluish and pale purplish colors. On the locomotive with base layers of complementary colors, add layers of local colors.

9Using the eraser

o express the whiteness of the clouds, use the eraser as if it were a pencil and remove colors down to the white base. Then, repeat this erasing technique for the smoke. Do not just leave these areas of removed color as they are; add layers of very faint color to adjust the whole tone.

10Finishing

Pictures colored by COUPY PENCILs often tend to have a pale tone finish; but this picture needs a darker finish as shown on the left, so color deeply to give a solid finished feel. Even in a mix of several color layers, COUPY PENCILs will not create muddy colors. Rather, by adding layers of different colors and repeating color mixes, beautiful shading will be created.